Mix together all ingredients in pot except butter. Then add butter in sticks. Cook over medium heat. Stir frequently to keep from burning on the bottom of the pot. Turn off heat after butter has melted and sauce begins to bubble. Let sit for 45 minutes to an hour before putting into jars or bottles.
3/4 cup slivered almonds, toasted in oven or under broiler (watch carefully!)
Directions:
Wash chicken breasts under cool water, pat dry and remove tendons as needed. Simmer gently in chicken broth and enough water to cover for about 20 minutes, or until white and cooked all the way through. Cool slightly, then slice into cubes or, using slicing blade in food processor, slice. (May need to chop by hand a little more after slicing.)
While chicken is cooking, in medium-size bowl, combine mayonnaise, Miracle Whip, sour cream, lemon juice, dill and salt and pepper. Stir to mix. Add celery, almonds and chicken pieces. Stir gently together and chill until ready to serve. (Add more mayo, MW or sour cream if mixture seems too dry.)
1/4 cup Unsweetened Cocoa Powder, Plus More For Sprinkling
1/3 cup All-purpose Flour
1/4 teaspoon Salt
4 Large Eggs
1/2 cup Granulated Sugar
4 Tablespoons Unsalted Butter, melted
FOR THE CREAM FILLING:
1 cup Heavy Cream
1/4 cup Sugar
1 teaspoon Vanilla Extract
FOR THE CHOCOLATE GANACHE:
4 ounces, weight Bittersweet Chocolate Chips Or Chopped Chocolate
1/2 cup Heavy Cream
1 Tablespoon Milk
INSTRUCTIONS:
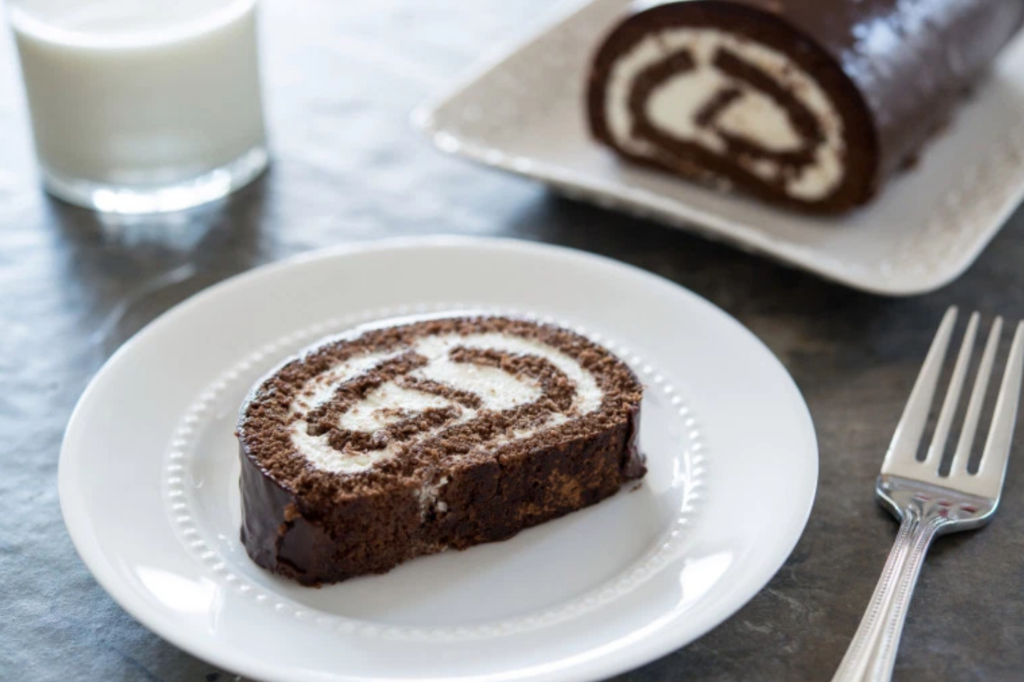
To make the chocolate cake, preheat the oven to 425ºF. Place a piece of parchment paper or a silicone mat on a 17×12 sheet pan, and rub butter on it to grease.
In a large bowl, whisk to combine the cocoa powder, flour, and salt.
Bring an inch of water to a simmer in a medium saucepan. Combine the eggs and sugar in a heatproof glass bowl, then place over the simmering water (make sure the water doesn’t touch the bowl). Using a hand mixer, beat the eggs and sugar together over medium speed for about two minutes, until the eggs are thick, pale yellow, and warm to the touch (if you have a thermometer, you want the eggs to be about 120ºF. If you don’t have a thermometer, just touch the mixture with your finger every once in a while until it feels like hot tap water).
Remove the egg bowl from the heat and continue beating at medium high speed for another 3 minutes, until it’s thick and airy, and has reached the ribbon stage. That means when you drag and drizzle a spoonful of the liquid, it shouldn’t settle back into the liquid for a good 5–10 seconds. Mix in the melted butter.
Add the dry ingredients to the mixture, and gently fold it into the eggs with a spatula, working quickly. Spread the batter onto the buttered parchment or silicone mat, leaving an inch from the edges. Bake the cake for 5–6 minutes, until springy to the touch.
Place a piece of parchment paper on a flat surface and sprinkle lightly with cocoa powder. Flip the cake onto the parchment, then remove the parchment or silicone mat that the cake baked on. Gently roll the cake up into a log while it’s still warm. This is like muscle memory for the cake, and it will roll easier again later.
To make the filling, combine the heavy cream, sugar, and vanilla extract in a large bowl, and whip with a hand mixer to stiff peaks, about 5 minutes on medium speed.
Unroll the cooled cake, then spread the cream all over, leave a 1-inch border around all edges. Roll the cake up gently (leaving the parchment paper behind), then place on a wire rack.
To make the chocolate ganache, microwave the cream and chocolate in a heatproof bowl in 30-second intervals, stirring after each time, until combined. Add the tablespoon of milk, which will give a more pourable consistency. Pour the chocolate ganache evenly over the cake, then refrigerate for 20 minutes before serving, so the ganache can firm up.
The cake is now ready to be sliced and served. Enjoy!
My husband has been talking about this dessert since Thanksgiving of last year. I was overwhelmed with regular Thanksgiving preparations to give this a try then so I finally agreed for his 40th in a couple days that I would make it for him. Can’t wait to taste it!!
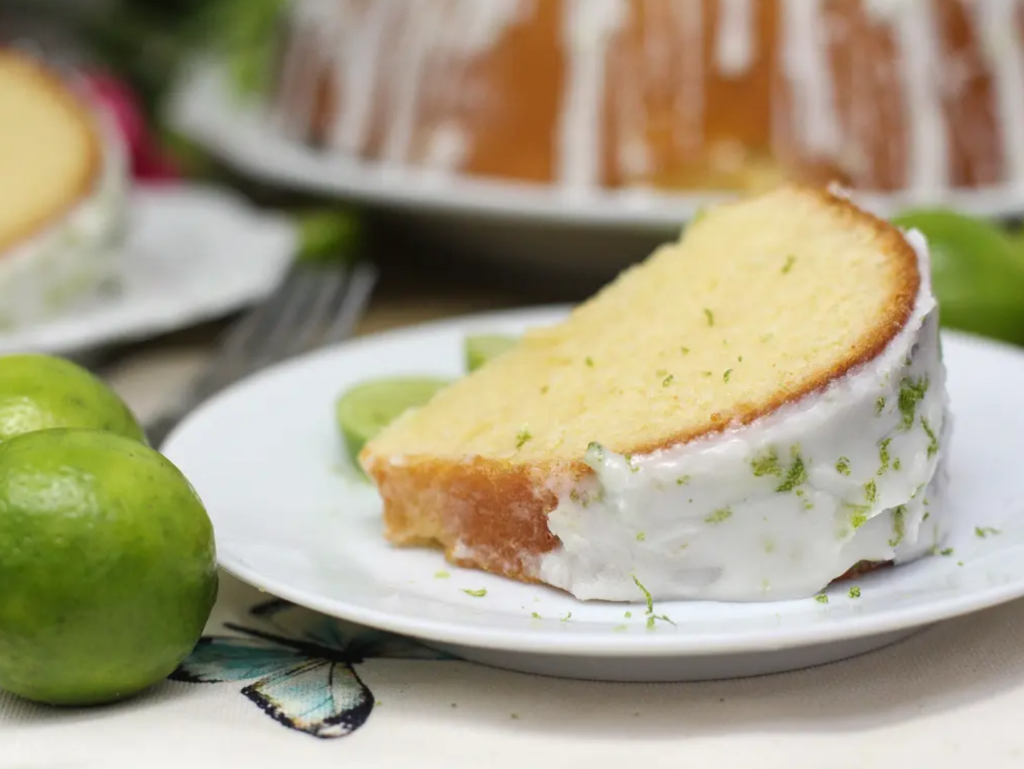
Homemade Key Lime Pound Cake w/ Key Lime Cream Cheese Icing! Bakes up dense and moist with plenty of fresh key lime flavor!Course cake, Dessert, pound cakeCuisine American, southernKeyword butter, cream cheese, icing, key lime, lime, pound cakePrep Time 20 minutesCook Time 1 hour 15 minutesTotal Time 1 hour 35 minutes
Ingredients
CAKE
3 cups all-purpose flour sifted
1/2 teaspoon baking powder
1/4 teaspoon salt
2 teaspoons key lime zest (zest from about 4-5 key limes)
1½ cups unsalted butter softened
3 cups granulated sugar
6 eggs room temperature
1 teaspoon vanilla extract
1 teaspoon lime extract
1/4 cup key lime juice (juice from about 4-5 key limes)
1/2 cup sour cream
1/2 cup buttermilk
KEY LIME CREAM CHEESE ICING
4 oz cream cheese softened
2 cups powdered sugar
1/4 cup key lime juice (juice from about 4-5 key limes)
1/4 cup milk (use enough to make icing pourable)
1-2 teaspoons key lime zest (plus more for garnishing if desired) (zest from about 4-5 key limes)
1 teaspoon vanilla extract (optional)
Instructions
Preheat oven to 325 F. Grease and lightly flour a 9½ inch bundt pan. Set aside.
In a large bowl whisk together flour, baking powder, salt and key lime zest. Set aside.
In a large bowl, using low mixer speed cream together butter and sugar just until combined.
Mix in eggs, one at a time until combine.
Mix in vanilla and lime extract.
Mix in key lime juice, sour cream and buttermilk.
Gradually add dry mixture into wet mixture until batter is fluffy and combined (DO NOT OVER MIX)
Spoon batter into prepared pan and shake the pan to level it out and remove air bubbles.
Bake for 1 hour and 15 minutes (may need a few extra minutes. I usually underbake slightly to get that perfect moist and velvety texture. Remember cake will continue to cook as it cool)
Remove from oven and place on a cooling rack.
When pan is cool enough to touch, remove cake from cake pan and allow cake to cool completely on the cooling rack.
MAKE THE GLAZE
To make the glaze, combine all glaze ingredients until smooth and silky.
Allow to chill in fridge.
Just before serving – Drizzle glaze over completely cooled cake and garnish with key lime zest.
Notes
*This pound cake tastes great the first day but even better the next day! If making for a special occasion, make it the day before.
My birthday happens to be Cinco de Mayo. And I happen to LOVE mexican food – including queso, guacamole and especially MARGARITAS! This is the best margarita you will ever have! An absolute crowd pleaser for our little party today so I absolutely had to write this one down. And yes, this is a picture of my half full glass.. next time I’ll take a pic before I dive in! Enjoy!
Ingredients:
1 can minute maid lemonade
3/4 can White Tequila
1 can Mexican beer like Corona or Modelo
1/2 cup Orange Juice (or Triple Sec)
Mix in big pitcher and serve over ice (with salt!)
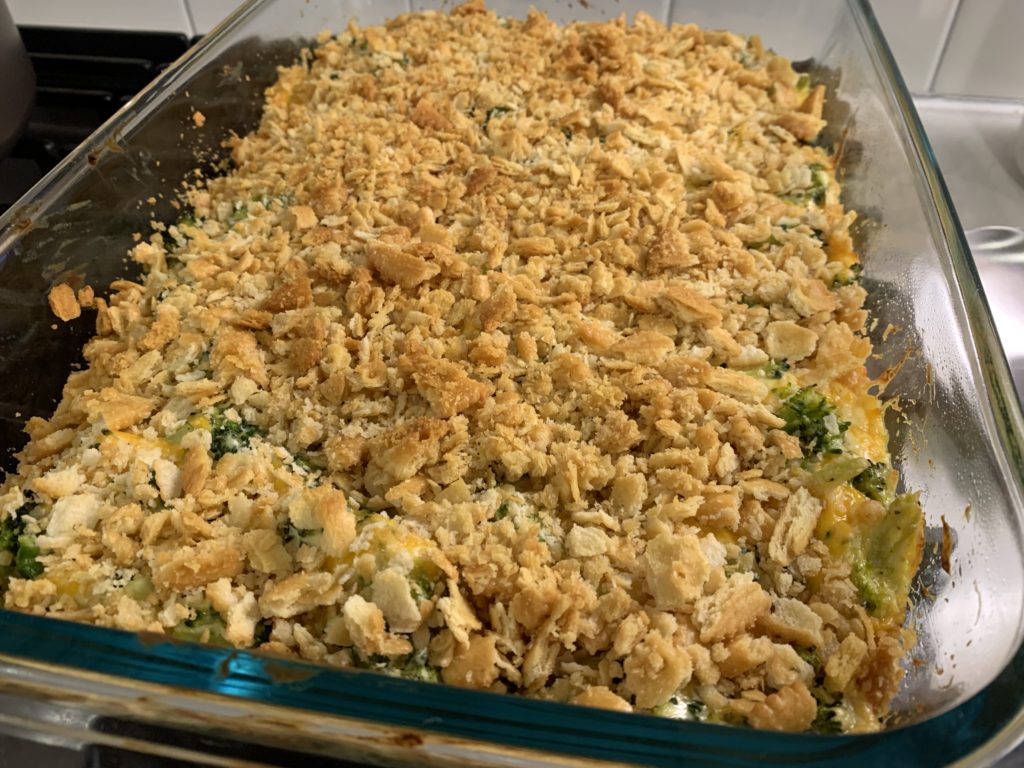
This broccoli and cheese casserole is made with fresh broccoli and topped off with buttery Ritz crackers for the perfect crunchy topping!
INGREDIENTS
32 ounces fresh broccoli florets
10 ounces cream of chicken soup
1 cup sour cream
1 1/2 cups shredded cheddar
1 teaspoon salt
1/2 teaspoon cracked pepper
1 1/2 cups crushed Ritz crackers
2 tablespoons melted butter
INSTRUCTIONS
Preheat oven to 350 degrees. Spray a 9×13 baking dish with non-stick spray.
Add the broccoli to a large microwave safe bowl along with ¼ cup of water. Cover tightly with plastic wrap and microwave for 5 minutes. Let stand, covered, for 2 minutes.
Carefully remove the plastic wrap and drain the liquid.
Add the cream of chicken soup, sour cream, salt, pepper, and cheddar to the bowl with the broccoli and stir well to combine.
Pour broccoli mixture into prepared baking dish.
Top with the cracker crumbs and drizzle with the melted butter.
Bake for 30-40 minutes, or until broccoli is as tender as you’d like and cheese is fully melted.