My husband found this article and sent it to me and I thought it was definitely worthy of a repost. I definitely fall into this season of “daily survival” and meeting our little one’s needs and often wonder, and more often worry, if we will be good parents and if our kids will grow up believing that. In the end I know they will be well loved and taken care of but I also know that I want to do whatever I can to insure that they have the best childhood (and best adulthood) I can possibly give and prepare for them. As with anything I’m no expert and so I have a deep passion for learning, exploring and doing whatever I can to be the best person and parent I can for my kids.. I hope you find this helpful as I did. Enjoy:
Huffington Post: 10 Common Mistakes Parents Today Make (Me Included) by Kari Kubiszyn Kampakis
When I became a mom, I got lots of advice on how to love my child. But not until a few years ago did someone actually point out that loving a child means wanting what’s best for them long-term.
When my four daughters were young, long-term didn’t resonate with me. Back then it was about survival, meeting daily needs and keeping my head above water.
Now that my kids are maturing, however, the fog is lifting. I’m no longer a pledge of parenting, but rather an indoctrinated member. The perk of this stage is that my kids want to spend time with me. We have real conversations that reveal their beautiful personalities. With everyone sleeping through the night, I’m sleeping better, too. I can think coherently and be more intentional in how I raise them.
These days, I put more thought into long-term. I think about the kind of adults I hope my children will be and work backward to ask, “What can I do today to foster that?” Being mindful of their future has changed my parenting paradigm, because what makes my children happy at age 10 or 15 is somewhat different from what will make them happy at age 25, 30, 40 and beyond.
A while back I came across some interesting articles and books that dig into what psychologists today are seeing: a rising number of 20-somethings who are depressedand don’t know why. These young adults claim they had magical childhoods. Their parents are their best friends. They never experienced tragedy or anything more than normal disappointments. Yet for some reason, they’re unhappy.
One reason given is that parents today are too quick to swoop in. We don’t want our children to fall, so instead of letting them experience adversity, we clear the path. We remove obstacles to make their life easy. But adversity is a part of life, and only by facing it can our children build life-coping skills they’ll need down the road. So while it seems like we’re doing them a favor, we’re really stunting their growth. We’re putting short-term payoffs over long-term well-being.
One article mentions incoming college freshmen known to deans as “teacups” for their fragility in the face of minor problems. The question posed was this: “Could it be that by protecting our kids from unhappiness as children, we’re depriving them of happiness as adults?”
Here’s psychiatrist Paul Bohn’s response, as paraphrased in the piece:
[M]any parents will do anything to avoid having their kids experience even mild discomfort, anxiety, or disappointment — “anything less than pleasant,” as he puts it — with the result that when, as adults, they experience the normal frustrations of life, they think something must be terribly wrong.
Why am I sharing this information? Because I think it’s relevant in this age of helicopter parenting. While I find it great that today’s parents are more invested in their children’s lives than previous generations, our involvement can go overboard. What we may justify as “good parenting” can hurt our children later. Unless we’re mindful of that, it’s easy to handicap them by making their lives too easy.
As my favorite parenting philosophy goes: “Prepare your child for the road, not the road for your child.”
With this said, I’ve outlined 10 common mistakes that parents today — me included — often make. My intention isn’t to point fingers, but to raise awareness. What may be ingrained in our culture is not always in the best interest of our kids.
Mistake #10: Worshipping our children. Many of us live in child-centered communities. We’re raising our kids in child-centered homes. Our children love this, of course, because our lives revolve around them. And for the most part we don’t mind either, because their happiness is our happiness. It thrills us to do for them, buy for them, and shower them with love and attention.
But I think it’s important to keep in mind that our children were made to be loved, not worshipped. So when we treat them like the center of the universe, we create a false idol, turning a good into an ultimate. Rather than kid-centered homes, we should strive for God-centered homes. Our children will still be loved, only in a better way, one that promotes selflessness over selfishness.
Mistake #9: Believing our children are perfect. One thing I often hear from professionals who work with children (counselors, teachers, etc.) is that parents today don’t want to hear anything negative about their kids. When concerns are raised, even concerns voiced out of love, the knee-jerk reaction is often to attack the messenger.
The truth can hurt, but when we listen with an open heart and mind we stand to benefit. We can intervene early before a situation gets out of hand. It’s easier to deal with a troubled child than repair a broken adult.
As a Children’s of Alabama psychiatrist recently told me when I interviewed her on teenage depression, early intervention is key because it can change the trajectory for the child’s life. She said that’s why she enjoys child and adolescent psychiatry — because kids are resilient, and it’s a lot easier to intervene effectively when they’re young instead of years later, when the problem has gone on so long it’s become incorporated into part of their identity.
Mistake #8: Living vicariously through our children. We parents take great pride in our children. When they succeed, it makes us happier than if we’d done it ourselves.
But if we’re overly involved and invested in their lives, it gets hard to see where they end and we begin. When our children become extensions of us, we may see them as our second chance. Suddenly it’s not about them, it’s about us. This is where their happiness starts getting confused with our happiness.
Mistake #7: Wanting to be our child’s BFF. When I asked a priest to name the biggest mistake he sees in parenting, he thought for a moment and then said, “Parents not being parents. Not stepping up to the plate to do hard things.”
Like everyone, I want my children to love me. I want them to sing my praises and appreciate me. But if I’m doing my job right, they’ll get mad and not like me sometimes. They’ll roll their eyes, moan and groan, and wish they’d been born into another family.
Seeking to be our child’s BFF can only lead to permissiveness and choices made out of desperation because we fear losing their approval. That’s not love on our end; that’s need.
Mistake #6: Engaging in competitive parenting. Every parent has a competitive streak. All it takes to stir this monster in us is another parent giving his or her child a leg up at our child’s expense.
I hear these stories a lot at the junior high and high school levels, stories of broken friendships and betrayals due to one family blindsiding another family. In my opinion, the root is fear. We fear our children will get left behind. We fear that if we don’t jump into the craziness, and pull out every stop to help them excel early, they’ll be stuck in mediocrity the rest of their life.
I believe children need to work hard and understand that dreams don’t come on a silver platter; they have to sweat and fight for them. But when we instill a “win at all costs” attitude, permitting them to throw anyone under the bus to get ahead, we lose sight of character.
Character may not seem important in adolescence, but in adulthood it’s everything.
Mistake #5: Missing the wonder of childhood. The other day I found a Strawberry Shortcake sticker on my kitchen sink. It reminded me how blessed I am to share my home with little people.
One day there won’t be stickers on my sink. There won’t be Barbies in my bathtub, baby dolls on my bed or Mary Poppins in the DVD player. My windows will be clear of sticky handprints, and my home will be quiet because my daughters will be hanging out with friends instead of nesting at home with me.
Raising small children can be hard, monotonous work. At times it’s so physically and emotionally exhausting we wish they were older to make our life easier. We’re also kind of curious who they’ll grow up to be. What will be their passion? Will their God-given gifts be clear? As parents we hope so, for knowing which strengths to nurture enables us to point them in the right direction.
But as we project into the future, wondering if our child’s knack for art will make them a Picasso, or if their melodic voice will create a Taylor Swift, we may forget to soak up the splendor in front of us: toddlers in footed pajamas, bedtime stories, tummy tickles and elated squeals. We may forget to let our children be little and enjoy the one childhood they’re given.
The pressures on kids start way too early. If we really want our kids to have a leg up, we need to protect them from these pressures. We need to let them have fun and grow at their own pace so 1) they can explore their interests without fear of failure and 2) they don’t get burned out.
Childhood is a time for free play and discovery. When we rush children through it, we rob them of an innocent age they’ll never pass through again.
Mistake #4: Raising the child we want, not the child we have. As parents we harbor dreams for our children. They start when we get pregnant, before the gender’s even known. Secretly we hope they’ll be like us, only smarter and more talented. We want to be their mentors, putting our life experiences to good use.
But the irony of parenting is that children turn our molds upside down. They come out wired in ways we never anticipated. Our job is to figure out their inherent, God-ordained bent and train them in that direction. Forcing our dreams on them won’t work. Only when we see them for who they are can we impact their life powerfully.
Mistake #3: Forgetting our actions speak louder than words. Sometimes when my kids ask a question, they’ll say, “Please answer in one sentence.” They know me well, for I’m always trying to squeeze life lessons into teachable moments. I want to fill them with wisdom, but what I forget is how my example overshadows my words.
How I handle rejection and adversity… how I treat friends and strangers… whether I nag or build up their father… they notice these things. And the way I respond gives them permission to act the same.
If I want my children to be wonderful, I need to aim for wonderful, too. I need to be the person I hope they’ll be.
Mistake #2: Judging other parents — and their kids. No matter how much we disagree with someone’s parenting style, it’s not our place to judge. Nobody in this world is “all good” or “all bad”; we’re all a mix of both, a community of sinners struggling with different demons.
Personally, I tend to cut other parents more slack when I’m going through hard spells. When my child is testing me, I’m compassionate to parents in the same boat. When my life is overwhelming, I’m forgiving of others who slip up and let things fall through the cracks.
We never know what someone’s going through or when we’ll need mercy ourselves. And while we can’t control judgmental thoughts, we can cut them short by seeking to understand the person instead of jumping to conclusions.
Mistake #1: Underestimating CHARACTER. If there’s one thing I hope to get right in my children, it’s their CORE. Character, moral fiber, an inner compass… these things lay the foundation for a happy, healthy future. They matter more than any report card or trophy ever will.
None of us can force character on our kids, and at age 10 or 15 character won’t mean much. Children care about short-term gratification, but we, as parents, know better. We know that what will matter at 25, 30 and 40 is not how far they once threw the football, or whether they made cheerleader, but how they treat others and what they think of themselves. If we want them to build character, confidence, strength and resilience, we need to let them face adversity and experience the pride that follows when they come out stronger on the other side.
It’s hard to see our children fall, but sometimes we have to. Sometimes we have to ask ourselves whether intervening is in their best interest. There are a million ways to love a child, but in our quest to make them happy, let us stay mindful that sometimes it takes short-term pain to earn long-term gain.
Original article available here.
 “Who is Vanessa Diffenbaugh?” my husband would ask me with a huge grin on his face. “Huh? I have no idea.” Thinking he was asking me about his latest Facebook friend request. “She’s the author of the book you’re supposed to be reading, the book that is supposed to be ‘Instantly entrancing.'” Oh right. That Vanessa Diffenbaugh. One of my book club books, the Language of Flowers sat out on our coffee table for almost a month begging to be read yet I constantly found myself passing it up for some other interest or pressing demand. Finally I picked up this book about a week ago (just in time for my book club meeting only a couple days away) and honestly I couldn’t put it down. I’m not often drawn to anything having to do with flowers, but the interweaving of the Victorian language of flowers used to convey romantic expressions, and the story of Victoria, a young girl emancipated from the foster care system with a gift for helping others, proved to be a story I could not put down. In the end Victoria finds that while she not only helps her customers with the flowers she chooses for them, she finds herself confronting her past with the opportunity for a second chance at happiness.







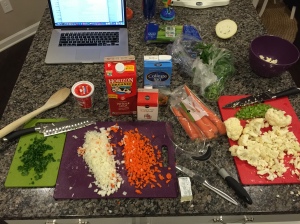


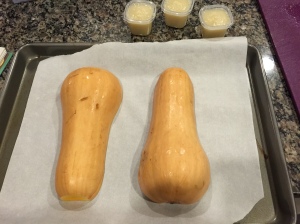 Today I decided to try making butternut squash using Sage Spoonfuls as a guide. Unlike the other fruits and veggies I’ve tried so far you don’t steam this one, you roast it. It takes a more time but the prep is minimal and its overall very simple to do. Here you go: